mapclay

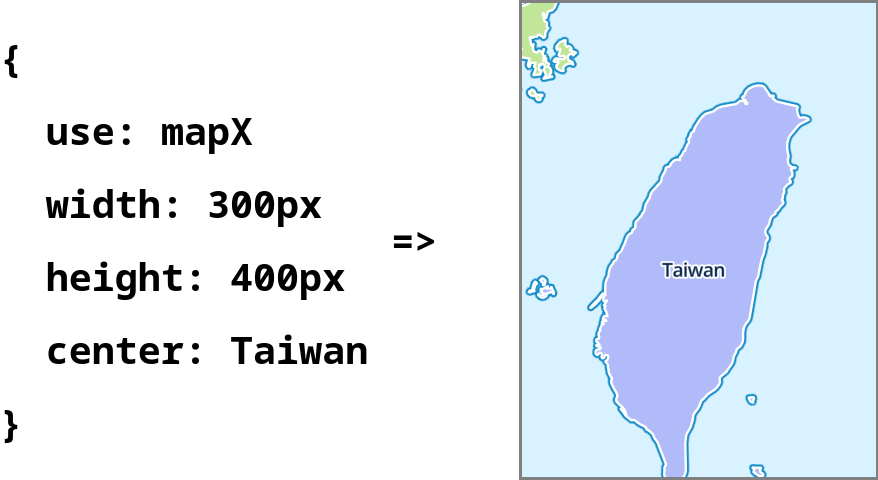
MapClay is a JavaScript library that allows you to create interactive maps using simple YAML or JSON configurations. It supports multiple map rendering engines, including Leaflet, Maplibre, and OpenLayers, making it flexible for various use cases.
Quick Start
Installation
You can include MapClay in your project using npm:
npm install mapclay
OR use it directly from a CDN as an ES module. The examples below import from or auto-run this URL:
https://unpkg.com/mapclay@latest/dist/mapclay.mjs
The minimal use cases
Add the module script from CDN with a query parameter target set to a
CSS selector for the target HTML element:
Try it out in the live playground — edit the YAML on the left, see the map render on the right
<!-- Target all <pre> elements -->
<pre></pre>
<script type="module" src='https://unpkg.com/mapclay@latest/dist/mapclay.mjs?target=pre'></script>

<!-- Or... -->

<!-- Target all elements with 'id="map"', selector '#map' in URL encoding is '%23map' -->
<div id='map'></div>
<script type="module" src='https://unpkg.com/mapclay@latest/dist/mapclay.mjs?target=%23map'></script>
The text content of target element would be parsed as YAML, So user can specify options to configure map.
<pre>
use: Maplibre
width: 400px
height: 50vh
center: [139.6917,35.6895]
zoom: 8
XYZ: https://tile.openstreetmap.jp/styles/osm-bright/512/{z}/{x}/{y}.png
</pre>

<script type="module" src='https://unpkg.com/mapclay@latest/dist/mapclay.mjs?target=pre'></script>
All valid target elements would be rendered:
<pre>use: Leaflet</pre>
<pre>use: Maplibre</pre>
<pre>use: Openlayers</pre>

<script type="module" src='https://unpkg.com/mapclay@latest/dist/mapclay.mjs?target=pre'></script>
API calls
If target is not given by <script> tag, render would not be automatically executed.
Here comes API:
<!DOCTYPE html>
<html lang="en">
<head>
    <title>Play with mapclay</title>
    <meta charset='utf-8'>
</head>
<body>
<pre id="map">
<!-- ...Options here! -->
</pre>
<script type="module">
import { render, renderByYaml } from 'https://unpkg.com/mapclay@latest/dist/mapclay.mjs'
//...Lets coding!
</script>
</body>
</html>
Render by text content
Still, write text content on target element for options.
And use renderByYaml() for this case:
<!-- In HTML body -->
<pre id="map">
use: Maplibre
width: 400px
height: 50vh
center: [139.6917,35.6895]
</pre>
// In <script type="module">
import { renderByYaml } from 'https://unpkg.com/mapclay@latest/dist/mapclay.mjs'

const target = document.querySelector('#map');
renderByYaml(target, target.textContent);
Render by config object
Instead of text content, you can manually specify options by config object:
// In <script type="module">
import { render } from 'https://unpkg.com/mapclay@latest/dist/mapclay.mjs'

const target = document.querySelector('#map');

render(target, {
  use: "Maplibre",
  width: "400px",
  height: "400px",
  center: [139.6917,35.6895],
  zoom: 8,
});
Options
Common Options
Except of special options defines a renderer, there is no mandatory options.
But there are some general optoins come with default Renderers:
| option | description | value |
|---|---|---|
| id | id of map HTML element | String, eg: openlayers |
| width | CSS width of map HTML element | String for CSS, eg: 100% |
| height | CSS height of map HTML element | String for CSS, eg: 200px |
| center | Center of map camera | Array in [lon, lat], eg: [24, 121] |
| zoom | Zoom level for map camera | Number 0-22, eg: 12 |
| debug | Show tile boundary | Boolean, eg: true |
| control | Object of control options, supports | fullscreen: true, scale: true |
| XYZ | Raster tile URL | URL with {x}, {y} and {z}, or a built-in preset name |
| GPX | GPX file path | String for fetchable resource path |
Option: aliases
object contains entry for each option
To improve readability. For each option, specify aliases with entries in key-value format:
# The following config file...
center: [139.6917,35.6895]
zoom: 10

# Is equal to the following:
center: Tokyo
zoom: Metropolitan area
aliases:
  center:
    Tokyo: [139.6917,35.6895]
  zoom:
    Metropolitan area: 10
To distinguish an alias from a normal string, each alias starts from Uppercase Char. If no value is specified in aliases, the original value would be taken.
# This is an invalid config file

center: tokyo  # Starts from lowercase, this is not an alias nor a valid value for option "center"
GPX: My-track1 # No matched value in aliases.GPX, renderer will use "My-track1" as resource path
aliases:
  center:
    Tokyo: [139.6917,35.6895]
  GPX:
    My-track2: https://example.com/track2.gpx
    My-track3: ./my-track3.gpx
If you want to put more information into each alias entry, use value to specify its value:
# The following alias...
aliases:
  center:
    Tykyo: [139.6917,35.6895]

## Is equals to the following:
aliases:
  center:
    Tykyo:
      value: [139.6917,35.6895]
      desc: The biggest city in Japan
Built-in aliases
Besides the hidden use aliases for default renderers, mapclay ships
a curated set of XYZ presets for keyless raster tile providers, so a basemap is
one word away:
use: Leaflet
XYZ: OpenTopoMap
Available presets: OSM, OSM HOT, OpenTopoMap, CyclOSM, CARTO Light,
CARTO Dark, Esri World Imagery, NLSC EMAP, NLSC Photo (the last two are
Taiwan-specific). Each preset carries its attribution text in its desc field;
mapclay does not render attribution on the map, so make sure your page credits
the tile provider accordingly.
Option: apply
URL of other config file
To reuse written config, use apply to specify resource path of another config file. Options in current config file are automatically assigned by it.
apply: https://unpkg.com/mapclay/assets/default.yml

# The following alias come from applied config file
center: Delhi
zoom: City
Option: use
URL of ES6 module, with Renderer class as default export
This option specify which Renderer is used to create a map.
If use is omitted, it defaults to the Leaflet alias (see Default Renderers).
# Use Renderer with Openlayers by resouece path
use: https://unpkg.com/mapclay/dist/renderers/openlayers.mjs
By default, mapclay.render() and mapclay.renderByYaml() comes with three hidden aliases for default Renderers.
Default Renderers
To use default renderers, specify use to one of the following aliases:
- Leaflet
- Maplibre
- Openlayers
Check out the source code for each Renderer.
# Use alias for Renderer in "use" option
use: Openlayers
aliases:
  # The following aliases are hidden by default
  use:
    Leaflet:
      value: ./renderers/leaflet.mjs
      desc: Leaflet is the leading open-source JavaScript library for mobile-friendly interactive maps. It has all the mapping features most developers ever need.
    Maplibre:
      value: ./renderers/maplibre.mjs
      desc: MapLibre GL JS is a TypeScript library that uses WebGL to render interactive maps from vector tiles in a browser. The customization of the map comply with the MapLibre Style Spec.
    Openlayers:
      value: ./renderers/openlayers.mjs
      desc: OpenLayers makes it easy to put a dynamic map in any web page. It can display map tiles, vector data and markers loaded from any source. OpenLayers has been developed to further the use of geographic information of all kinds.
How the alias paths resolve
The default use aliases point to relative paths (./renderers/*.mjs). They are
imported relative to the loaded mapclay module, so they only resolve where a
renderers/ directory sits next to it:
- npm (
import ... from 'mapclay'): resolves throughindex.mjs→dist/mapclay.mjs, which ships alongsidedist/renderers/, so the aliases work out of the box. - CDN (
<script type="module" src="…/dist/mapclay.mjs">): the dynamicimport()resolves against the module’s own URL, so the aliases work as long asdist/renderers/sits next to the loadedmapclay.mjs(which it does on unpkg).
Always load mapclay through its package entry or the dist/ bundle. The package also
ships src/**, but deep-importing the unbundled src/mapclay.mjs is not a supported
entry point: there is no src/renderers/ directory, so the built-in aliases won’t resolve.
If you do consume the source directly, override the use alias with a full URL or your own
Renderer.
Renderer
In short:
A Renderer is an Object with ‘steps’ property, which value is an array of render functions.
For example, this is a minimal valid Renderer Object:
const renderer = {
  steps: [
    function addContent({target}) {
      target.textContent = 'Hello Renderer!'
    }
  ]
}

mapclay.render(element, {
  use: renderer
})
mapclay.render() probably do the followings behind:
- Create a new child element with class
mapclay, it would be assign totargetproperty of config file - Get Renderer by
usevalue in current config file- If config file is within
steps, itself is Renderer - If value of
useis an object withinsteps, take it as Renderer - If value of
useis a valid URL, import it as ES6 module. And use default export as class. Get instance of Renderer by callingnewoperator
For the second case and third case, all config properties would be applied to Renderer
- If config file is within
- Call each function in
stepsone by one. Function would be bound to Renderer, and Renderer itself is the only argument. Like the following:
console.log(renderer.steps) // return [step1, step2, step3...]

// Pesudo code in mapclay.render()
prepareRendering()
  .then(() => step1.call(renderer, renderer))
  .then(() => step2.call(renderer, renderer))
  .then(() => step3.call(renderer, renderer))
  ...
With these features, each step function can use destructuring assignment to get arguments to do renderering:
// Get arguments from Renderer Object
function stepXXX({target, width, height}) {
  target.style.width = width + 'px'
  target.style.height = height + 'px'
  ...
}
Default Renderers only implements basic features. Create a new one if they don’t fit your need. Here is a short example about creating a new custom Renderer Class, which is based on default Renderer Maplibre:
import MaplibreRenderer from 'https://unpkg.com/mapclay/dist/renderers/maplibre.mjs'

export default class extends MaplibreRenderer {
  // Override default steps in default class
  get steps() {
    return [...super.steps, this.customStep];
  }

  // Override method createView()
  async customStep({target, customOption}) {
    doSomething(target, customOption)
  }
}
Then put the new Renderer into option use:
use: https://path/to/custom-module-with-renderer.mjs
More details
JSON as text content
Since YAML is a superset of JSON , user can still write JSON in text content of element:
<pre>
  {
    "use": "Openlayers",
    "center": "Tykyo",
    "zoom": 8
  }
</pre>
Multiple config files
Since YAML docs are separated by ---, you can render multiple maps at once in a single target element by multiple YAML docs.
# These are three valid YAML docs

use: Leaflet
---
use: Maplibre
---
use: Openlayers
Run scripts after map is created
Default Renderers use eval options for custom scripts, it simply run eval(VALUE_OF_OPTION).
# Get methods in current Renderer
use: Openlayers
eval: console.log(Object.entries(this))
# Get View projection from ol.Map, it returns EPSG:3857 by default
use: Openlayers
eval: console.log(map.getView().getProjection().getCode())
Though YAML supports multi-lines string by symbol > and |, but indent really bothers.
To make it simpler, if YAML doc is parsed as string, it would be treated as value of eval of last YAML doc.
So the following config…
# This YAML doc would be parsed as a JSON object
use: Leaflet
eval: |
  console('This is the first YAML doc')
  console('with multi-lines')
  console('string of script')
---
# This YAML doc would be parsed as a JSON object
use: Openlayers
eval: console('This is the second YAML doc')
Equals to this… (; at end of line matters):
# This YAML doc would be parsed as a JSON object
use: Leaflet
---
# This YAML doc would be parsed as String
console('This is the first YAML doc');
console('with multi-lines');
console('string of script');
---
# This YAML doc would be parsed as a JSON object
use: Maplibre
---
# This YAML doc would be parsed as String
console('This is the second YAML doc');
Development
Working on mapclay itself? See DEVELOPMENT.md for setup, build,
and the renderer/steps model. Planned work and known issues live in
issues/ (one markdown file per issue; see the Issue tracking section
of DEVELOPMENT.md).
See Also
- MapML: https://maps4html.org/web-map-doc/